


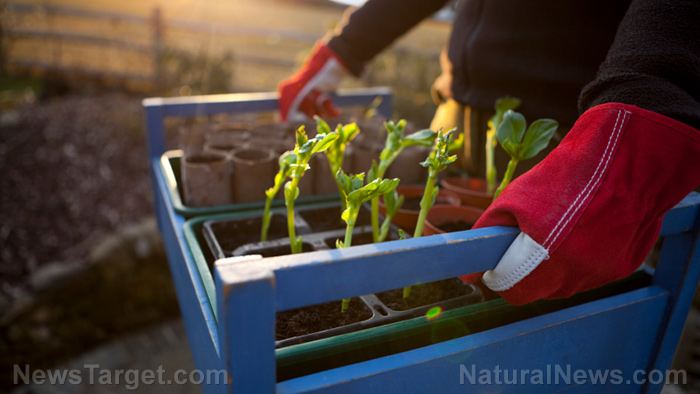
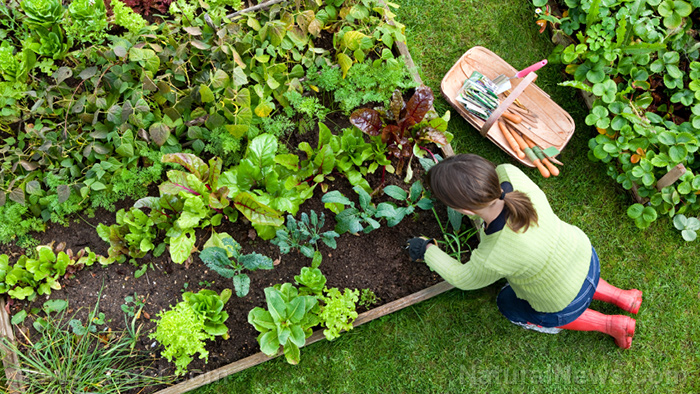
You don't need to have a "green thumb" to successfully grow your own plants – oftentimes, all it takes is preparation. Take seeds, for example. Starting seeds can be easy and rewarding. Even if you have never started any type of plant from seed, it isn't that daunting – but there are some things you have to remember to make sure you aren't just burying your seeds. Here are some tips to consider when planning to start your own seeds at home. (h/t to HomesteadAdvisor.com)

Timing your planting
You can't just start seeds at any given time; you must get the seeds started around six weeks before they need to be transplanted to the garden if you want to have anything growing.
That said, the correct planting time varies depending on your location. It takes six to eight weeks for plants to be ready to be transferred. So, if you are in the southern part of the U.S., you must start warm weather crops like tomatoes, peppers, watermelon and squash in late February.
Find out when the last frost date in the spring is in your area, and start your seeds around six weeks prior to that.
Planting depth
If you decide to start seeds in a pot, use 2-inch pots and fill them with potting mix. Pack it down, so all the gaps are filled in. Place your seed in the pot and cover it with at least 1/4 inch of soil.
A good rule of thumb is to cover the seed about twice as deep as the seed is in diameter. If it is a very small seed, just sift a little of the potting mix over the seed while a kernel of corn might have 1/4 inch of soil on top of it. Let the size of the seed determine how deep it should be planted.
People often make the mistake of burying seeds too deep. Look at nature; most seeds in nature drift in the wind till they land on the soil. At that point, they are not immediately covered with soil, but with a thin layer of dirt or foliage. Whether you are starting seeds indoors or are planting seeds directly in the garden, the seeds should only be planted in this manner. If you want the seeds to germinate, remember to never bury them too deep.
If you are still worried that your seeds may not germinate, plant two seeds in each pot. If both seeds end up germinating, you can decide if you want to keep both plants or if you want to "thin" (eradicate) one of the new seedlings.
Temperature
Heat (warmth) is essential in starting seeds. Every seed has its own desired temperature that will ensure its germination. Most seeds need between 75 and 80 degrees to germinate.
Seedling heat mats may be a good tool for helping seeds start successfully. They have thermostats that keep the temperature constant, which can help increase the success of your seeds' germination rate. Seedling heat mats come in different sizes, which can accommodate both hobby gardeners and professional gardeners.
If you don't have a heat mat, you can find a warm place in your home, such as the top of a refrigerator or near a wood stove.
Moreover, you may need to "harden off" your seedlings before you can fully transfer them out to the garden. That means taking them outside for a few hours each day to get accustomed to the temperature change. When you are sure that the danger of frost in your area has passed, stick your seedlings in the ground and water them right after planting to seal the soil around the roots.
Light source
Once the seeds have germinated, you will need a way to give them plenty of light. Your seedlings will not become viable without a strong source of light. Do not settle for the window or your seedlings will get "leggy," meaning they will grow very long, very fast but with a very thin stem, which can fail to support the plant.
So, when about 75 percent of the seeds are germinated, it’s time to get them under a light source. You can put your seedlings under a grow light or put them in a greenhouse. If you are using a grow light, make sure it has the full spectrum of light and uses efficient LEDs. Have the light a couple of inches from the seedlings and leave it on them for about 16 hours a day. Adjust the distance of the grow light from the seedlings as they grow up and reach for it.
If you want your seedlings to be exposed to natural light, you can bring them out each morning and let them stay in the sun all day, which is a little labor-intensive. Moreover, you must remember to bring them back in at dusk so they won’t freeze to death. (Related: Indoor gardening for beginners: How to start a garden amid the coronavirus lockdowns.)
Moisture
Seedlings must be kept moist. Water your seedlings right after covering them with potting mix. Spritz water over the seed trays using a misting bottle. The first “misting” should water the mix completely through. You might have to spray often since you will be applying only small amounts of water with the mist to avoid disturbing the seeds. Don't use a hose or watering can that can splash too much water on them, especially if you have small seeds that can be easily washed away.
You can also water from underneath: Put holes in the bottom of the seed tray and put it in a larger tray or tub that has a ½ inch of water in it. The holes in the seed tray will allow water to seep into the potting mix and keep the potting material moist.
The bulk method
If you are planning to plant a lot of seeds of one variety, you can try bulk planting. This method is a little more labor-intensive, but it is a huge time-saver.
For bulk planting, put your potting soil in a container or tray about 2 to 3 inches deep. Scatter the seeds very thickly on top of the potting soil, then cover with a dusting of potting mix, perlite or vermiculite.
The seedlings should come up in a thick mass. The roots will be tangled with each other, but they can be easily separated later.
When your seedlings are 4 to 5 inches tall and have their first true leaves, separate the plants into individual pots or cups or six-packs so they can grow without any competition. Most vegetables’ roots separate very easily with no damage to the small plant. Tomatoes and pepper plants are some examples of resilient plants that grow well using bulk planting.
There are other factors to consider when starting your own seedlings. Visit HomeGardeningNews.com to learn more.
Sources include:


Please contact us for more information.